Recommendations to keep in mind when designing in order to have successful products in Gold.
Material Info
Our Gold is the easiest and fastest way to create golden parts or jewelry. Jewelers, designers, hobbyists can go straight from a 3D design to a final product without any special, technical knowledge.
Gold models are 3D printed using a complex five-step process. First, the model is printed in castable resin using a specialized high-resolution 3D printer. It is then put in a container where liquid plaster is poured in around it. When the plaster sets, the wax is melted out in a furnace, and the remaining plaster becomes the mold.
Molten Gold is poured into this mold and set to harden. The plaster is broken away, revealing your new product. The product is then carefully cleaned and hand-polished to give it the trademark Gold luster. Please be aware that polishing can wear down or fill in very fine details and edges. Polishing also removes a bit of material from your product in order to smooth it out, so the exact volume may be slightly smaller than that of your digital model.
The look and feel of all Gold products is smooth and shiny due to the extensive hand-polishing process.
When we hand-polish your Golden model, some material will inherently be worn off. Please note that the volume of your finished product may be up to 10% less than the original model due to shrinkage and polishing loss.
Disclaimer:
Bounding Box (size)
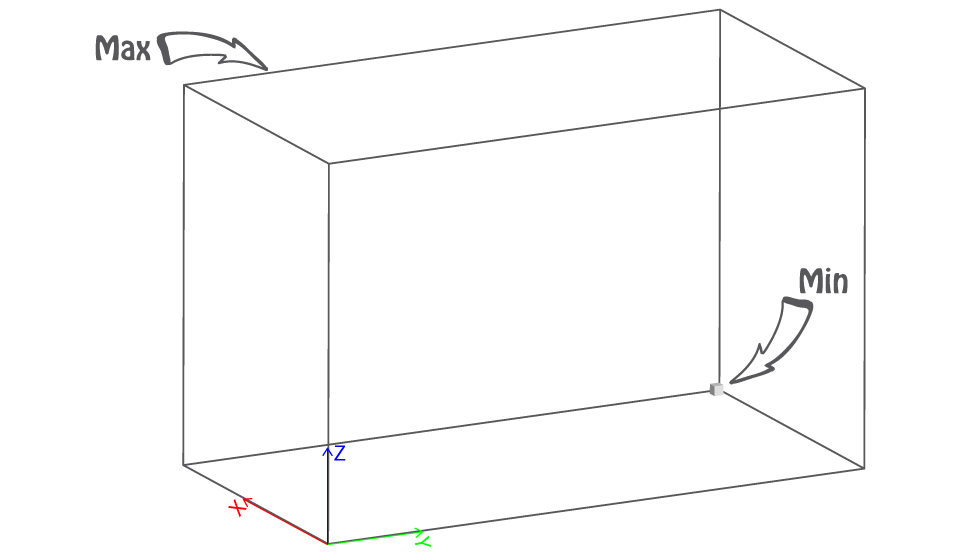
The bounding box represents the size we are able to print at once.
Min X + Y + Z ≥ 10mm
In order to be able to print your model, each of its pieces must be greater to those dimensions.
If the bounding box of your model is not bigger than our minimum, try scaling it up or making it thicker or enlarging some of its parts/features or any combination of the above.
Max 100x100x100mm
In order to be able to print your model, each of its pieces must fit within those dimensions.
If the bounding box of your model is bigger than our maximum, try scaling it down or removing unnecessary features/parts or cutting it to smaller parts or any combination of the above.
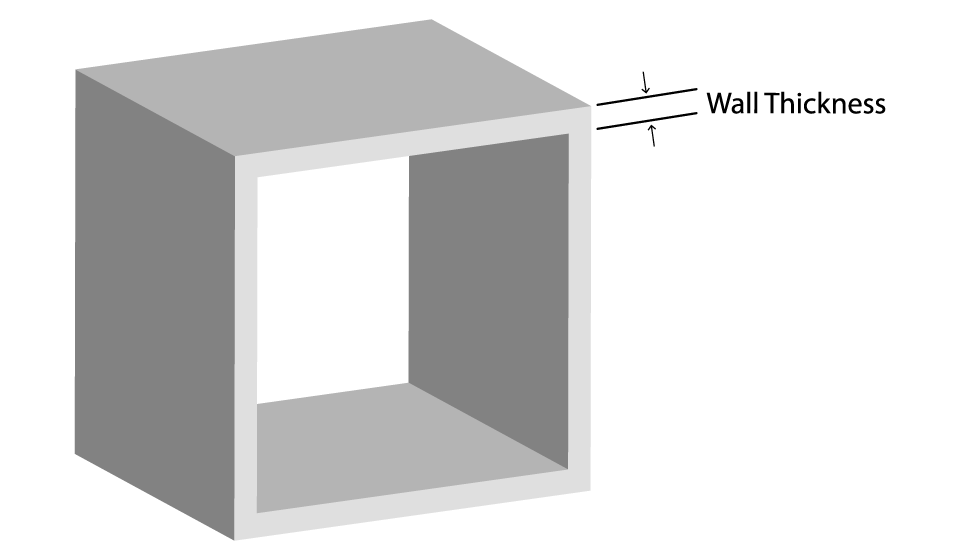
Wall thickness (minimum)
It represents the minimum wall thickness required in order to be able to produce your model, ship it and reach you unharmed. A wall could also be defined as the distance between two parts which form a closed and solid mesh.
Tip: The thicker the model, the more solid and safer to handle it gets. We recommend thicker walls for big and/or complex designs. The geometry of the model plays a crucial role on the solidity as well.
Supported (min 0.8mm at print size)
A wall is considered supported if it is connected to two or more walls on at least two of each sides.
If any supported walls are not thicker than the minimum required, try making them thicker, or adding supports or both.
Unsupported (min 0.8mm at print size)
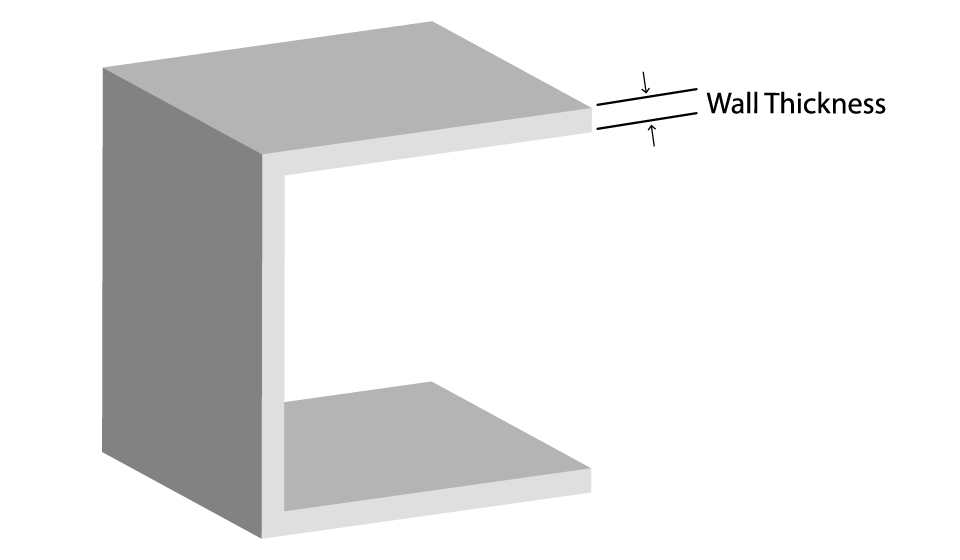
A wall is considered unsupported if it is connected to other walls on one side only.
If any unsupported walls are not thicker than the minimum required, try making them thicker or adding supports or both.
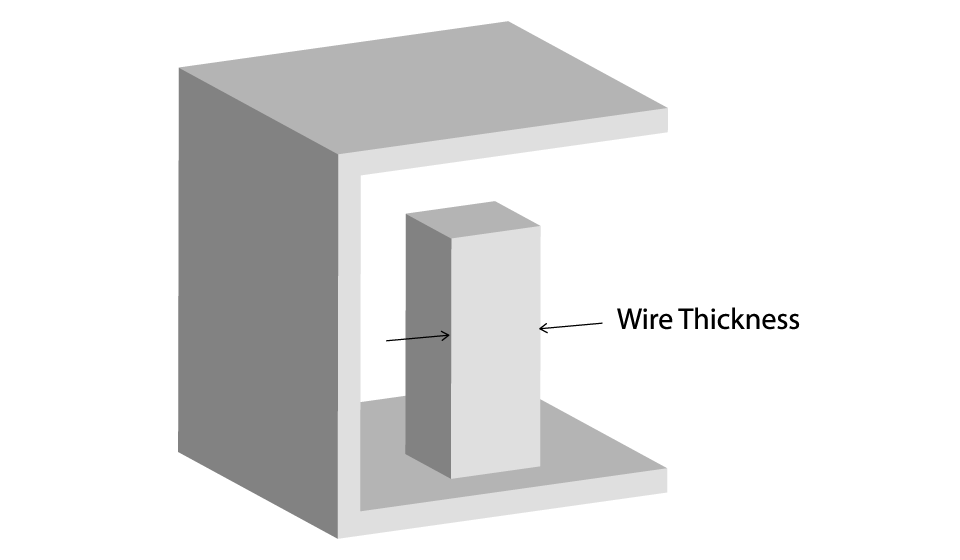
Wires
Wires are long and thin features of a model. As wire is considered a part whose length is two times greater than its width.
Tip: In general, wires follow the same rules as walls; nevertheless, due to their delicate nature you should be extra cautious when designing them.
Supported (min 0.8mm at print size)
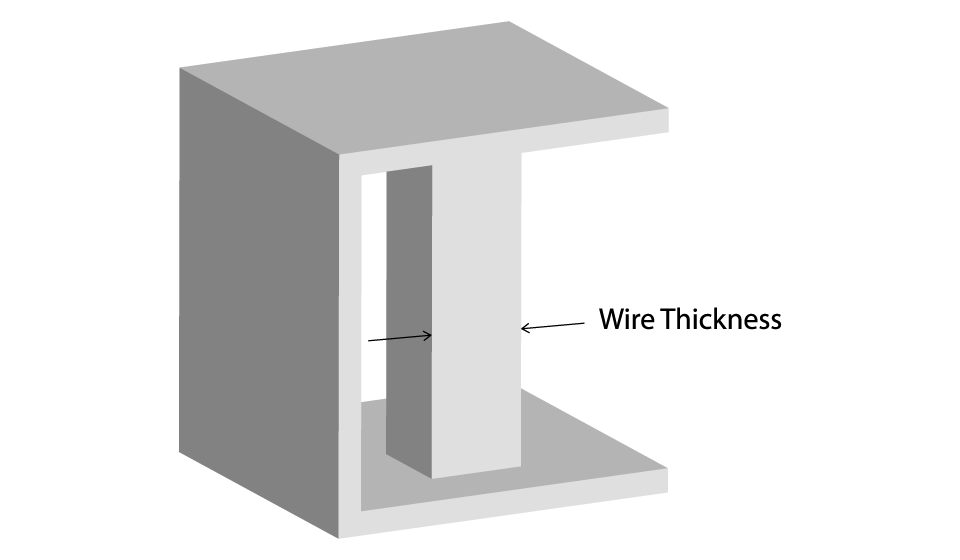
A wire is considered supported if it is connected to two or more walls on at least two of each sides.
If any supported wires are not thicker than the minimum required, try making them thicker, or adding supports or both.
Unsupported (min 1.0mm at print size)
A wire is considered unsupported if it is connected to other walls on one side only.
If any unsupported wires are not thicker than the minimum required, try making them thicker, or adding supports or both.
Details
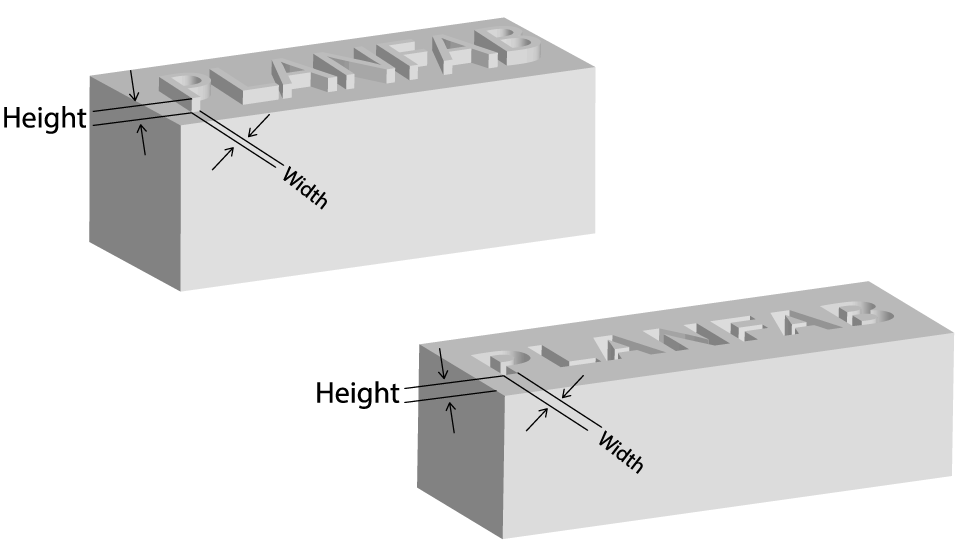
As details are considered all those features whose length is less than two times their width. Details could be either embossed or engraved on a surface.
Make sure your detail’s length and width is greater than the minimum required, or else they won’t be clear and visible (the larger the detail, the more visible and clear it gets).
If any details on your model are not greater than the minimum required try making them bigger or removing them.
Engraved
Minimum line thickness ≥ 0.35mm
Minimum depth ≥ 0.35mm
Embossed
Minimum line thickness ≥ 0.4mm
Minimum depth ≥ 0.4mm
Escape holes
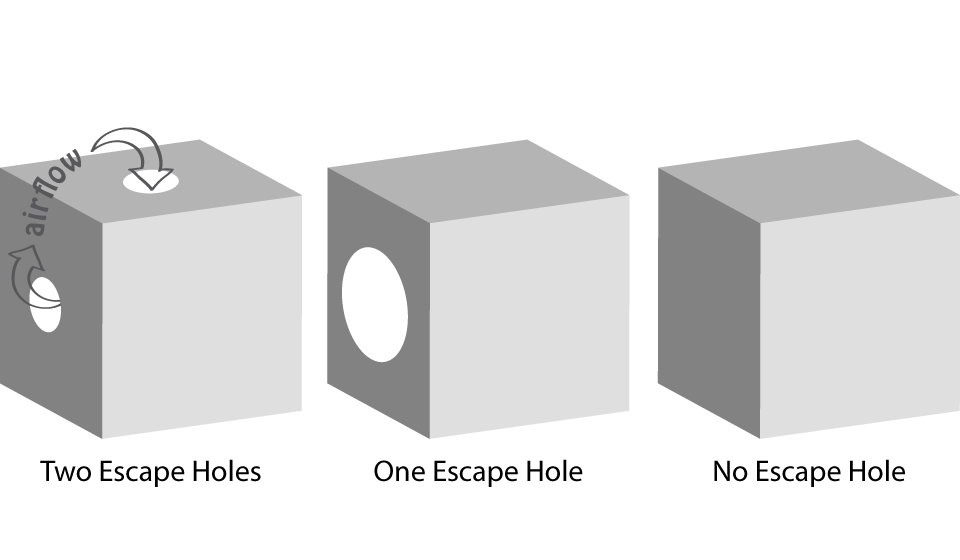
Drain holes are recommended for unbuilt material to escape in models that are a fully enclosed cavity (like a hollow sphere or hollow cylinder). Without drain holes of at least 7.0 mm in diameter, the part may trap resin, plaster or metal and lead to a ruined product.
If the model has complex geometry with many separate hollow cavities, make sure there is an escape route for every cavity.
If your escape holes are not sufficient and over the minimum requirements, try enlarging them or adding more or filling the hollow space or any combination of the above.
Another way for unbuilt material to escape is by using multiple smaller holes like a strainer. In this case, the holes can be significant smaller.
Clearance (0.3mm at print size)
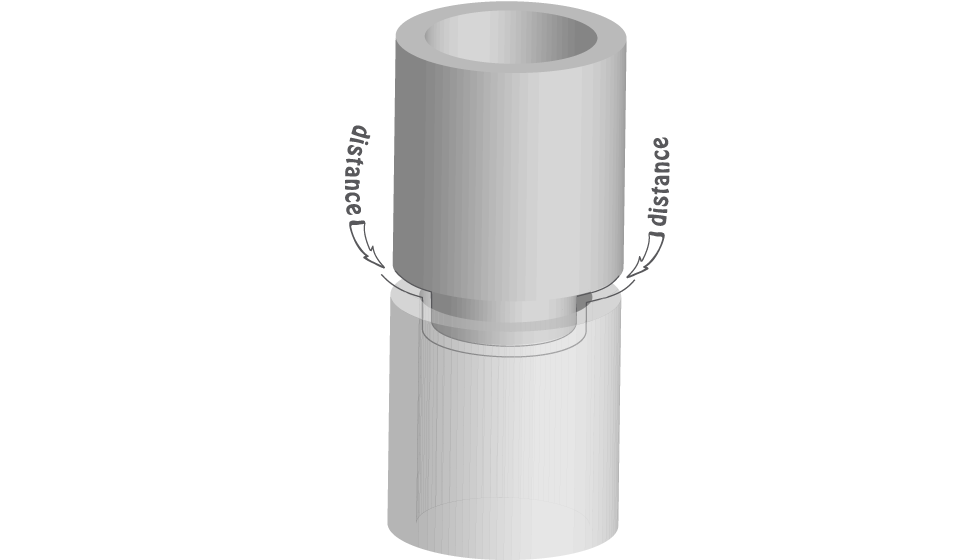
Clearance is the distance between any two parts.
If your clearance is not over the minimum required, try making it greater or fuse the parts together if their independence is unnecessary.
Interlocking and enclosed parts
While we can produce interlocking and enclosed parts, these parts are usually treated as separate parts and combined afterwards. For example, the links of a chain are produced separately and combined afterwards by our specialist jewelers.
However, there are cases that the interlocking parts are treated as one, especially in bigger models.
Multiple parts per model file
Yes. Multiple parts per model file can be processed and produced in Gold.
Material Traits
Golden products have all the usual traits of Gold items and need the same handling and care.
Some detail is lost during polishing
Polishing gives Gold a beautiful finish, but can have an impact on fine details. During the polishing step, fine or sharp-edged details may be polished down or even broken off. Keep this in mind when you are designing fine details.
Internal detail cannot be polished
We can only polish well-reachable surfaces, so tight internal spaces may remain unpolished.
Design Tips
Keep embossed and engraved details shallow
Engraved details must not be too deep, and embossed details must not be too tall. The width of your detail must be the same or greater than how far it juts out from the surface (or sinks in for engraving). Engraved details that are too deep will cause issues when casting. Embossed details that are too tall are more likely to chip and break during production (unless the detail meets the minimum wall requirements).
Ring bands should be at least 1mm thick
Ring band (the part that goes around the finger) needs to be 1mm thick to avoid deformation when wearing.
Stone holding prongs should be short
Prongs for holding stones cannot be too long without anything connecting them. This connecting beam is to prevent the resin from breaking away. Also, with thin and long prongs, the product will not to be able to hold big stones. Make sure your stone will sit snug and tight.
Wires must be at least 0.8mm thick
Wire frame models are difficult to print and fragile. While 0.8mm wires work well for small models, we recommend using thicker wires on larger models ensure strength and durability.